Angler Taking Over Main Dataset (Pixel) in Meta
Step by step guide to turn off existing CAPI and turn on Angler predictive CAPI to your brand's main dataset
Angler’s Predictive CAPI (P-CAPI) can be implemented in two ways: either through a standalone dataset (pixel) or by integrating directly into your main pixel. Taking over the main pixel is often the preferred approach, as it allows Angler’s predictive signals to enhance all existing and future campaigns seamlessly.
Advantages of using the main pixel:
Your ad account retains the full history and learnings from the main pixel while gaining the benefits of Angler’s high-quality predictive signals.
No need to create new campaigns — existing campaigns will immediately start optimizing with Angler’s P-CAPI.
Important setup notes:
Before activating Angler’s P-CAPI events on the main pixel:
Disable your current server-side CAPI connection.
Ensure that a browser pixel connection remains active.
For detailed, step-by-step setup instructions, please refer to this guide.
Step 1: Angler starts sending events to your main pixel
Please confirm the dataset ID of your main pixel with your Angler Customer Success representative ([email protected]). If you have multiple datasets, be sure to share all relevant IDs where you'd like to receive Angler’s predictive CAPI signals.
Additionally, review and confirm your event taxonomy to ensure all standard, custom, and optimization events required for reporting and performance are properly covered.
Your Angler rep will notify you once setup is complete and events are flowing correctly.
Step 2: Turn off your existing C-API connection to the main pixel
If you're using Shopify CAPI, please follow these instructions to disable Shopify’s CAPI while keeping the Meta browser pixel connection active. Once complete, no further action is needed.
If you're using a third-party CAPI provider (e.g., Elevar, Blotout, Aimerce, Triple Whale Sonar, etc.), please coordinate with your provider to disable their CAPI for the main pixel. This may be possible directly through the vendor's UI (DIY), or you may need to reach out to your account contact for assistance.
Step 3: Turn on Meta Browser Pixel
If you were previously using Shopify CAPI, you can skip this step.
However, if you were using a third-party CAPI provider (e.g., Elevar), it's likely they also installed the Meta browser pixel on your behalf. Disabling their connection may remove the browser pixel as well.
To restore the browser pixel, simply install Shopify’s free Facebook & Instagram app. Follow the steps below to complete the setup:
3.1. Log into your Shopify Admin and navigate to Sales Channels > Facebook & Instagram
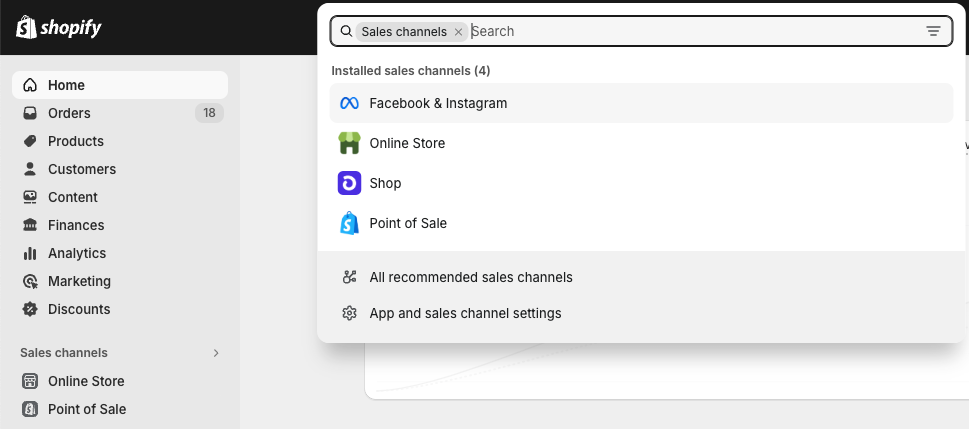
3.2. Navigate to the Settings tab

3.3. After authenticating to Meta, set your data sharing preference to Conservative
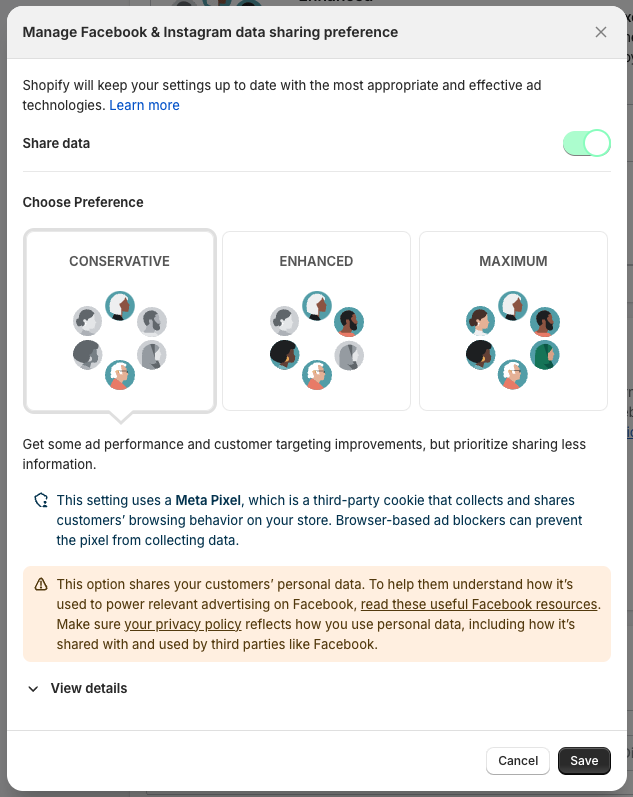
This setting will keep the browser-based Meta Pixel active on your store, but won't enable the Shopify server-side C-API integration. This will enable Angler to send P-CAPI Events without duplicating data and impacting Meta reporting.