S3 Data Upload Instructions
Onboarding: Sending Historical Data to Angler via S3
Using Cyberduck or Filezilla
This guide will walk you through uploading your customer data to Angler AI via S3, a cloud storage service. Prior to this guide, make sure you have followed the Standard Data Specification to generate customers, orders, line items, and products files.
- Download a file transfer client such as Cyberduck or Filezilla Pro.
- Note: the following instructions assume you have Cyberduck.
- Install the Cyberduck client.
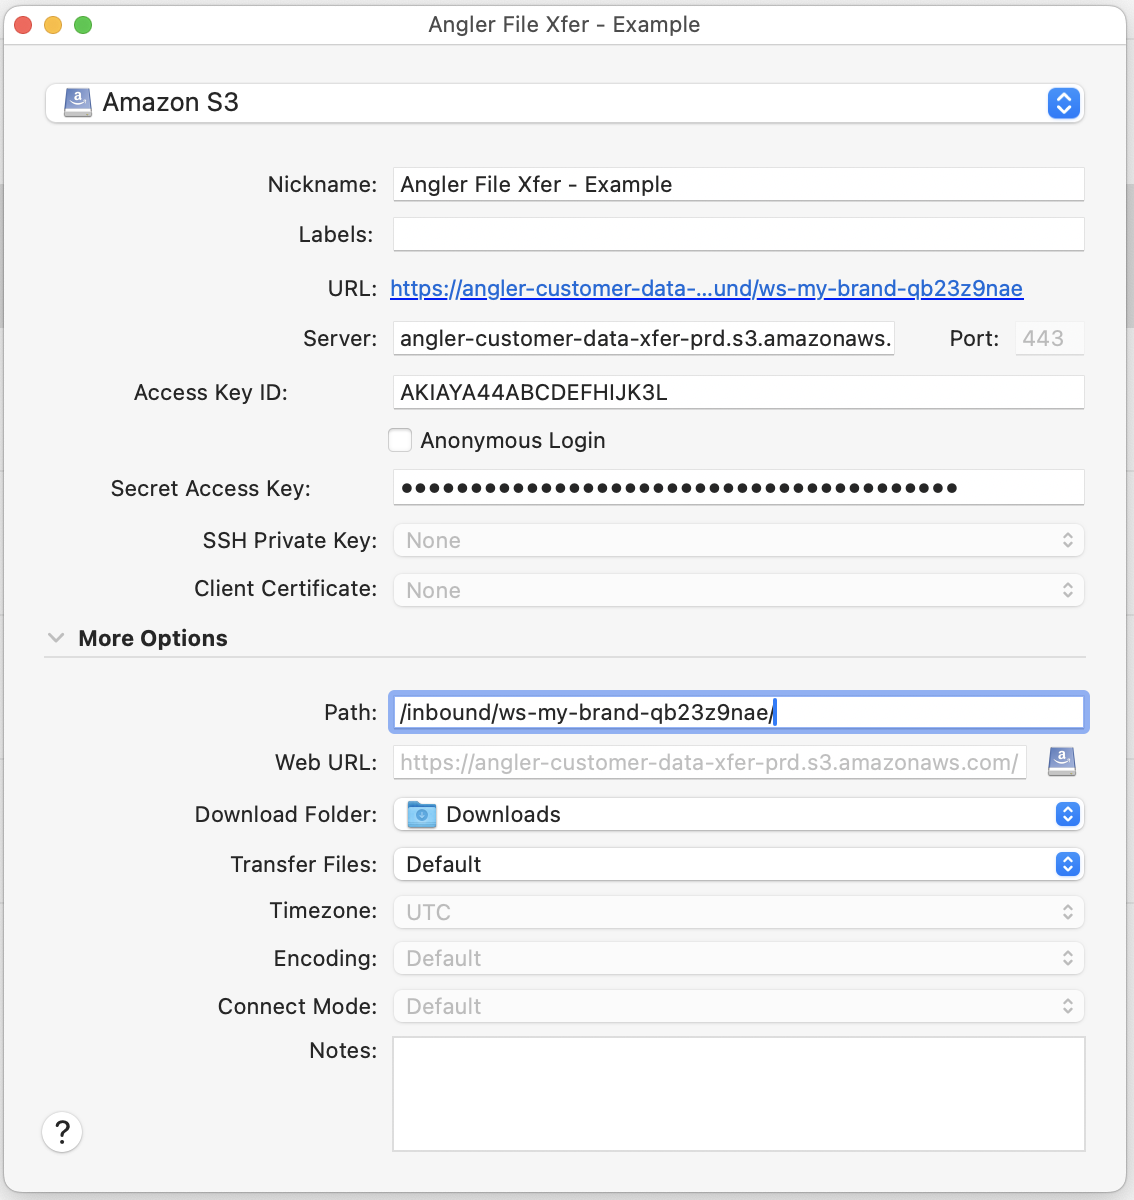
- Create a new bookmark.
- Enter bookmark details (see screenshot below for reference).
- Type: Amazon S3
- Server: angler-customer-data-xfer-prd.s3.amazonaws.com
- Port: 443
- Access Key ID: provided via email or in Angler web app
- Secret Access Key: provided via email or in Angler web app
- Path: provided via email or in Angler web app; follows structure: /inbound/[Workspace ID]/
- Connect to the bookmark.
- Navigate to the appropriate sub-folder:
- customers/
- lineItems/
- orders/
- products/
- Upload the desired file.
Using WinSCP
-
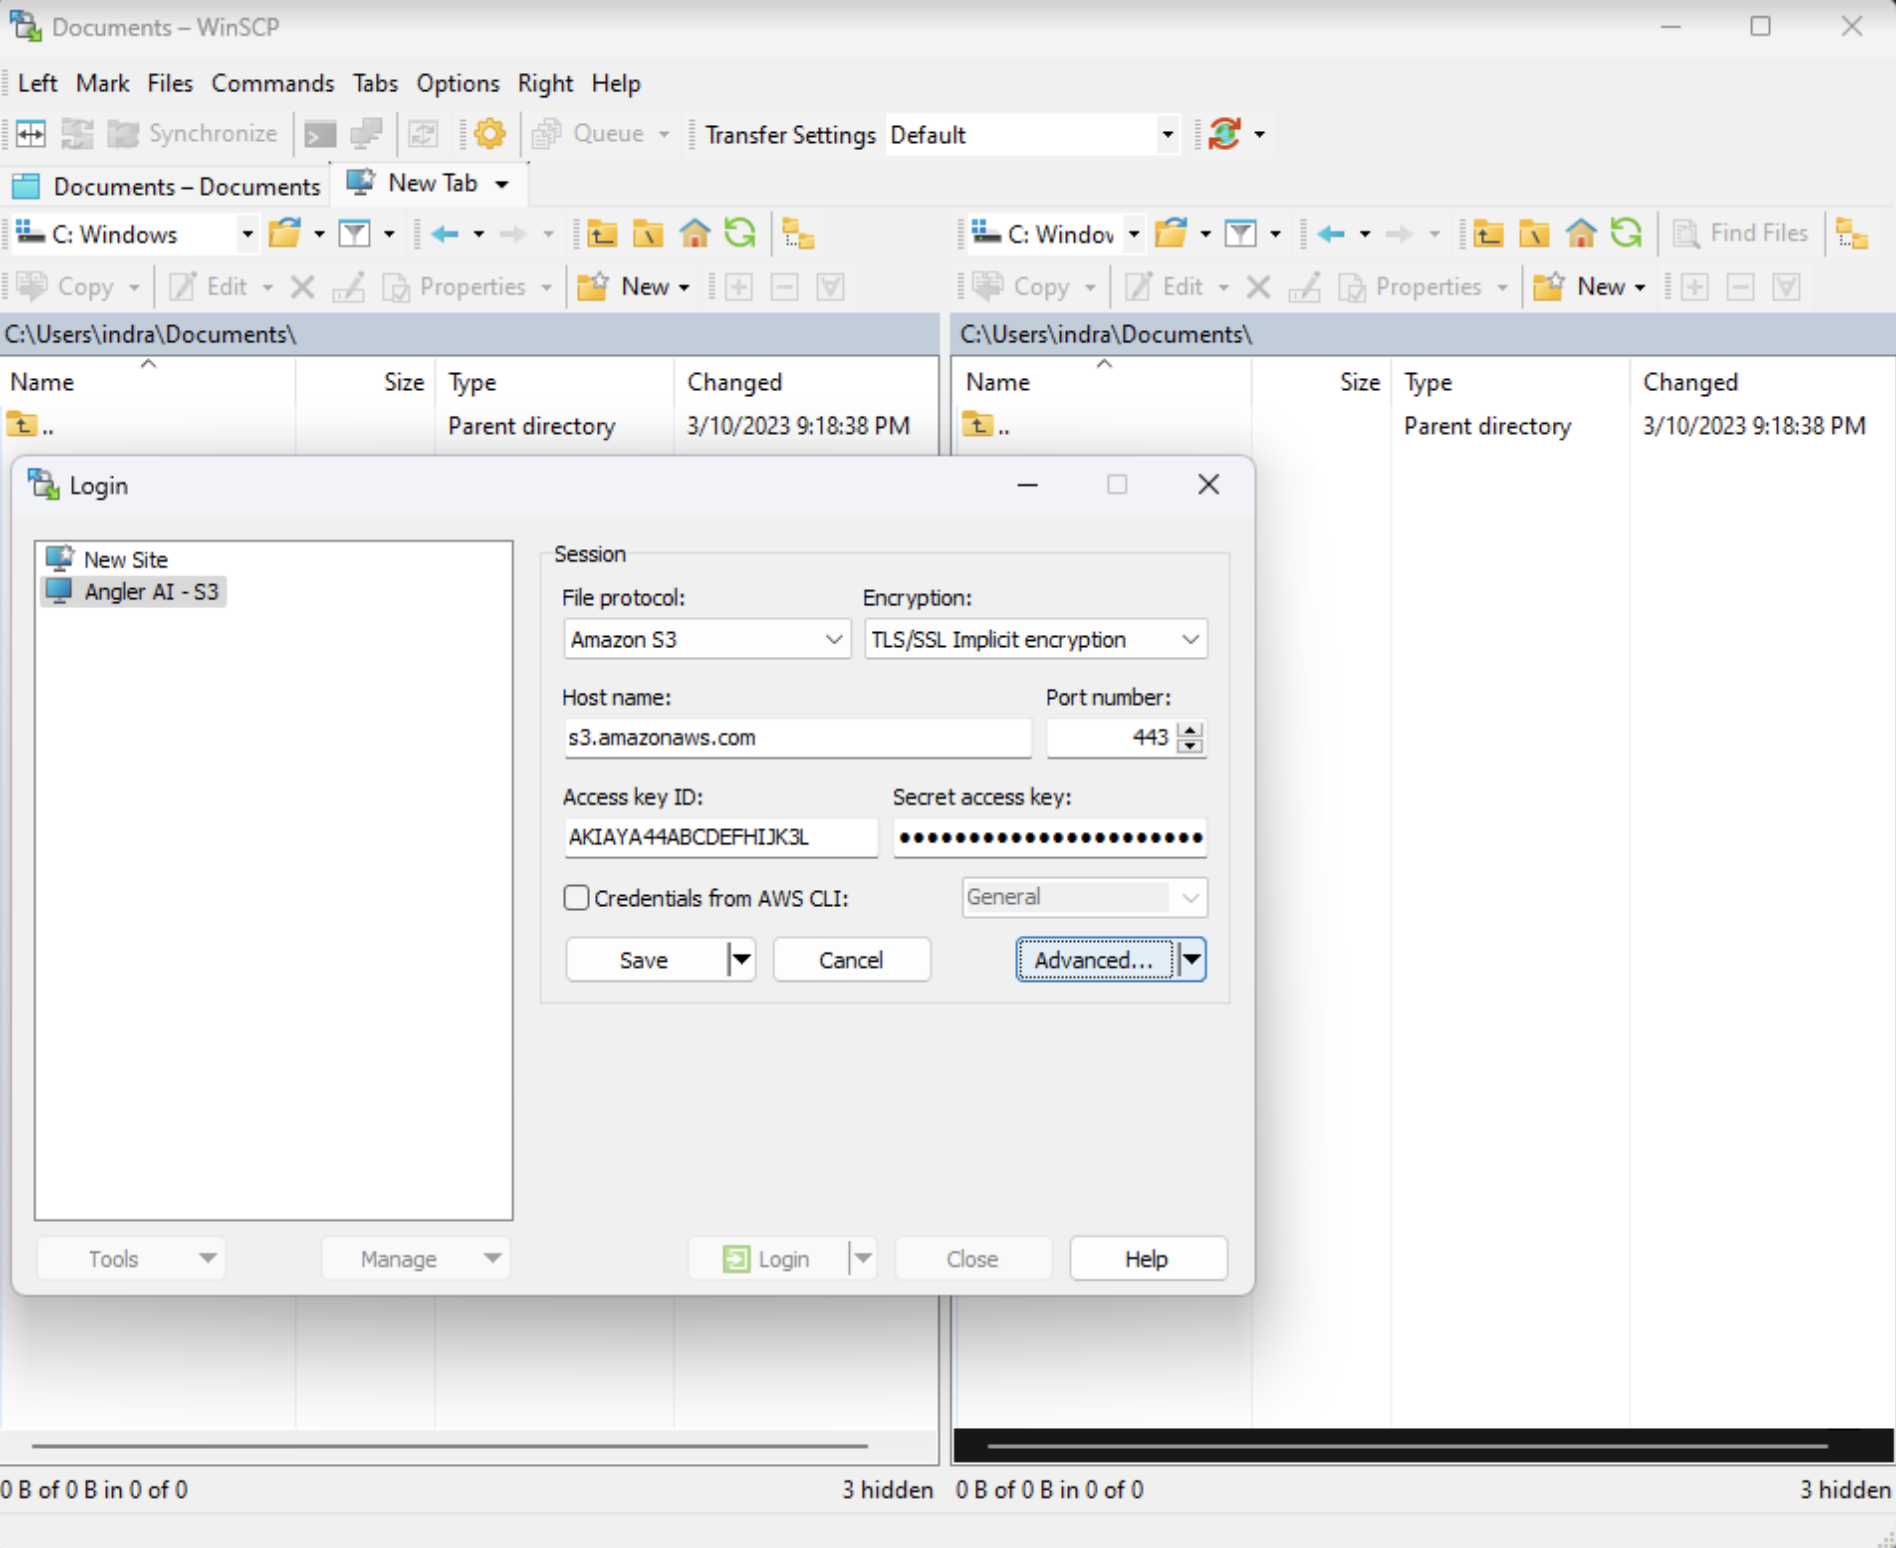
In site manager, make sure the file protocol is Amazon S3, then click Advanced

-
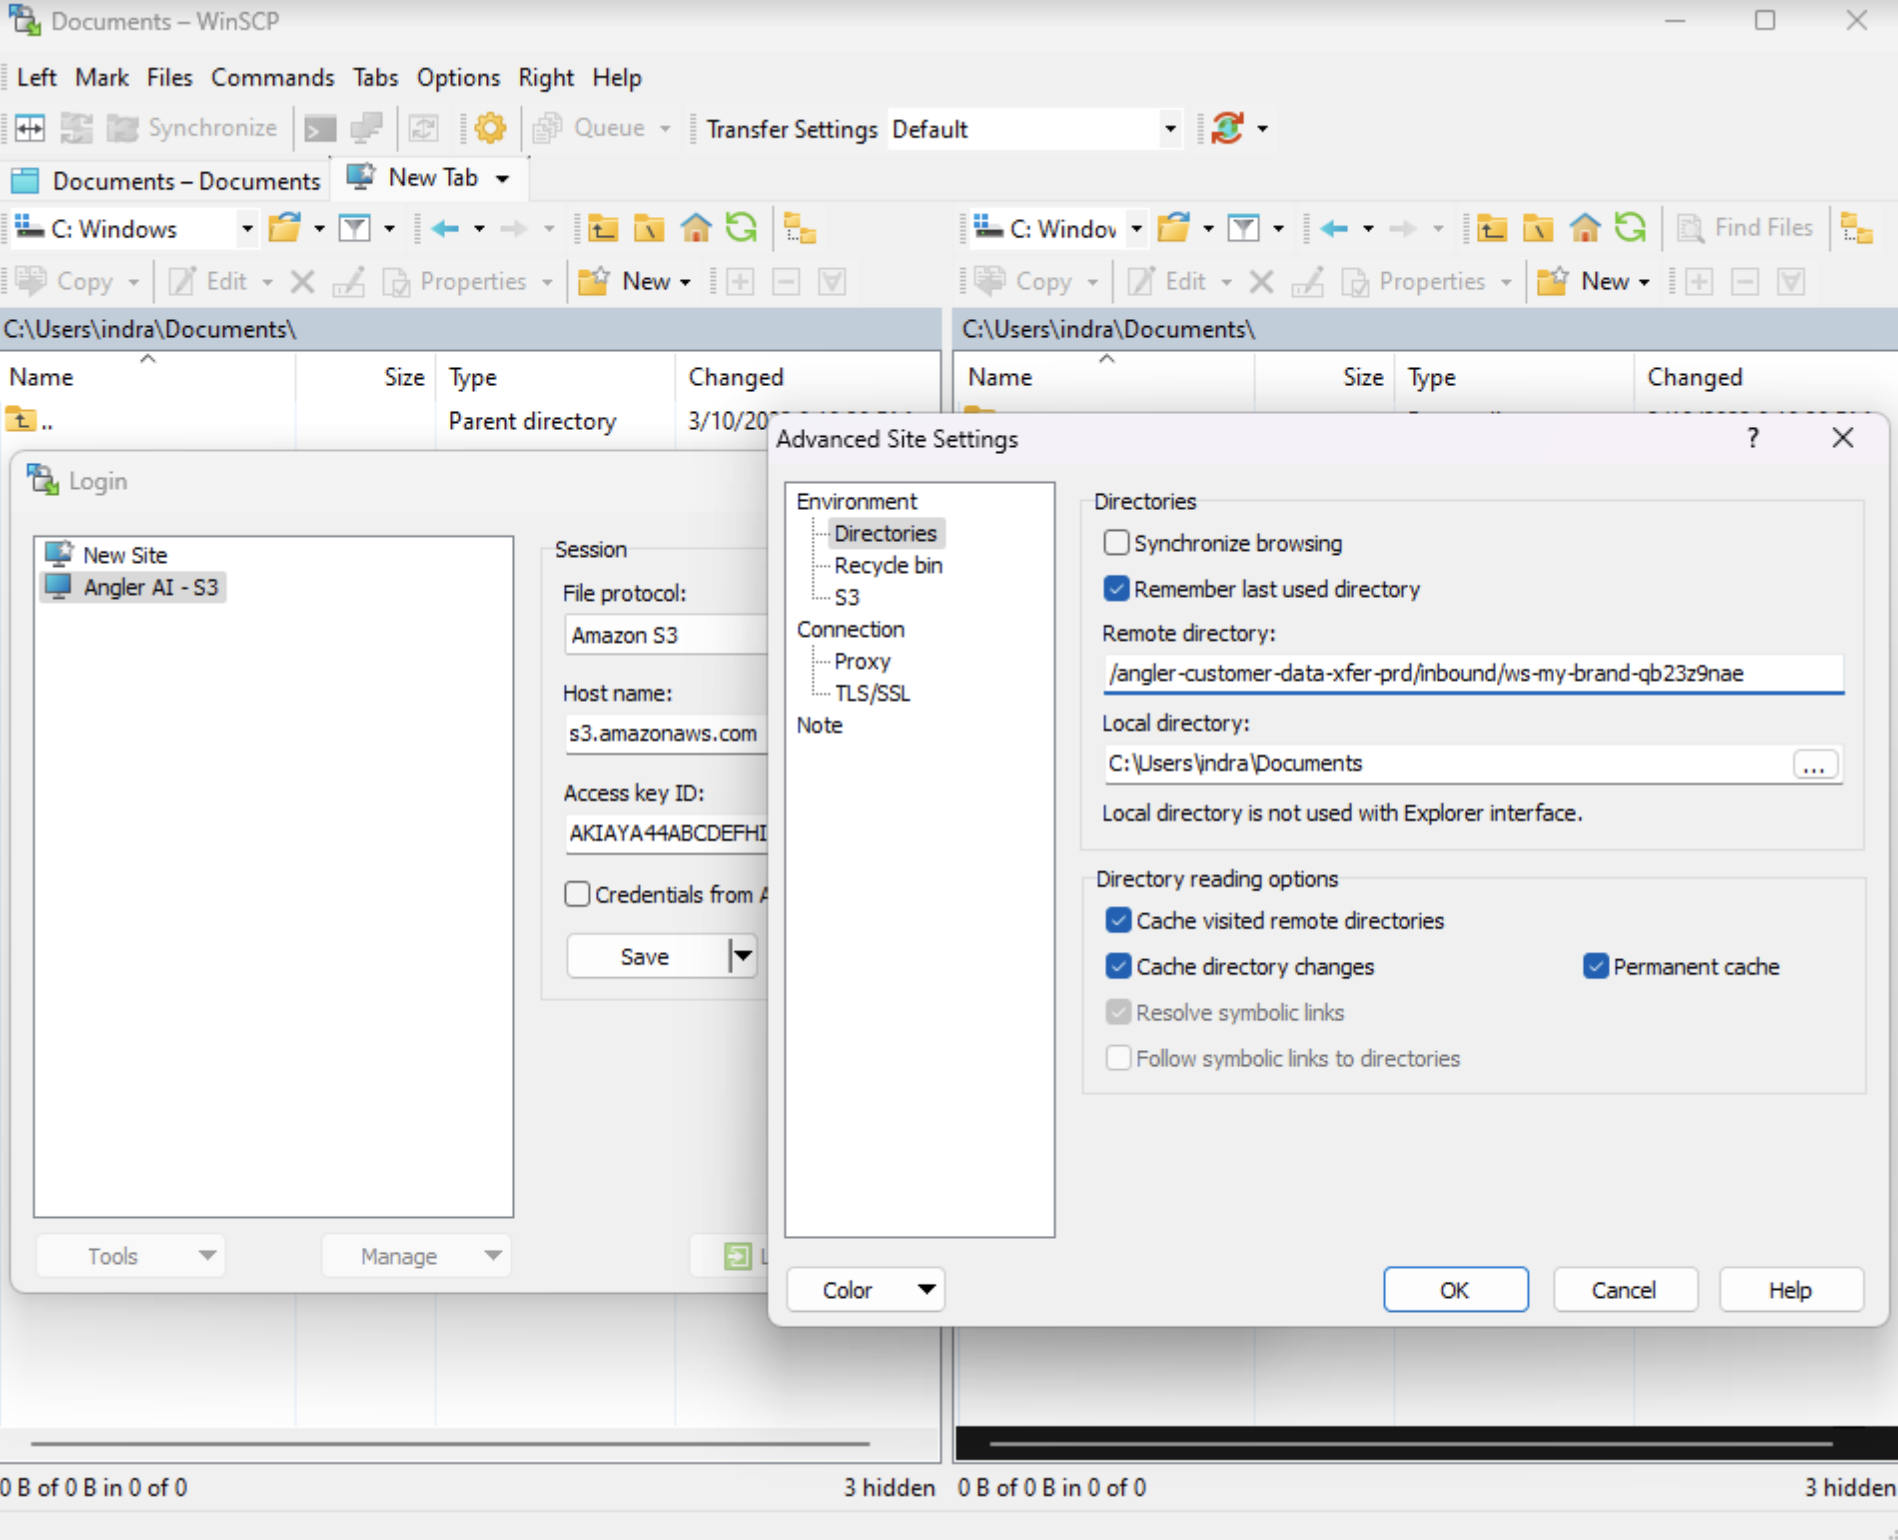
In Advanced Site Settings > Environment > Directories, set the remote directory as it is provided via email or in Angler web app; include text after angler-customer-data-xfer-prd/inbound/
Please let us know if you have any questions or issues!